Tuesday, March 25, 2014

Edwardian Wedding Dress: all the beads

First, thank you for following along this far! Not only did this dress project take longer than a usual project, my blog posts about it have also taken four times longer than usual.
February 6, I was finished with basting the lace appliques in place and ready to start with my bead design. It was tough to get started - I'd never done a beading project this large before, and with seed beads so tiny, I couldn't exactly place them on the lace to see how they would look before I started sewing them on. I knew I wanted to have the beads bring in a hint of color and sparkle, and to accent the shapes of the scalloped edging and scrolls.

To review, here are the beads I had assembled for the project:
more commonly known as "all the beads"
With only three weeks to go before my self-imposed deadline, I decided to work in waves. That way, I could be sure to not find myself at the end of February with a dress that was clearly unfinished or uneven.
My first pass was to bead the scallops. I wanted to bring in some color here but not a lot. I was a bit timid here, since I wasn't really sure what the cumulative effect would be once I'd gone around the whole dress. At this point, I didn't bead any of the scrolls or other appliques:
This pass completed, I was really pleased with how the blue sequins and seed beads were picking up the blue of the chiffon sash. This was the one element of the dress that wasn't exactly clicking for me, but I figured that would change as the beading project went on.

I paused here to make the green gown for my daughter - if you haven't read about that yet, you can do so here.  That project took just over a week, then I was back to beading.  My next step was to focus on filling in the lace appliques. This is what I had after the first pass:

center back medallions holding the drape

where the skirt back meets the train

first pass at beading the scrolls


Overall, I was pretty happy with where things were going but I knew here that I wanted to have a lot more beads on the lace. A quick check of the calendar showed that I had a week to go before it was time to declare this dress "done" and move on to making a waistcoat and trousers. However, I do like a challenge so I abandoned my plan of working in waves and decided to jump in with both feet start filling in the blanks.

By this time, I had decided that the scrolls reminded me of nautilus shells as well as feathered fronts. To accent both of these things, I focused on accenting the spines of the swirls in addition to the feathered edges. For the train, I differentiated between the large motifs and the small. This was because the larger scrolls were focused at center back while the smaller scrolls go up the skirt. This kept with my fade/ombre idea from the initial design.  On the bodice, I just alternated every other scroll to ensure more even color coverage.  The floral appliques I beaded to match what I had done in the first pass where the drape attaches. I also filled in the edge lace with a lot more color:
edges filled in, and small scrolls
with gold pints and blue spines

floral inserts between small and large scrolls

the train, completely beaded
This was also where I made the call to go ahead and add colored beads to the bodice insert. I had been toying all along whether or not I should do this step. My reasons for doing it were two fold: first, the insert was a bit too flesh-colored for my liking and second, I had not yet used the smokier beads I had purchased.  They looked a little odd to mix in with the vibrant colors, and I hated to see them go unused. To do this, I needed to un-bead the portion of the lace which would show when the dress was worn and tie off the threads. I then worked the smoky blue and peach beads and the green "pearls" into the lace where I had removed the white beads and sequins. Here is the completed bodice:

This brings me to March 6. For those of you keeping track, this does mean that I did not finish on the day I had set for myself as a deadline. I knew I had run that chance when I had decided to jump in with a heavier beading plan, and just decided it was going to be okay to run a bit over. After all, I still had about week to go, right? With this done, it was time to step away and get that waistcoat and trousers project done. Fiances are patient, but there's no need to push it. I draped the dress on my mannequin, knowing I would need to come back to it in order to apply hooks and eyes or ask a friend to sew me in. That seemed like a viable option, since I do have some fairly talented friends who would be able to do just that. Six days and four yards of divine wool later, I undraped the dress with every intention of sewing on the hooks and eyes then bagging it up. However, as I looked at it on the mannequin, I just really didn't love that blue silk drape. I had hoped it would grow on me, and that once the beads were on then it would work, but the fact was that it just didn't. It was just past midnight on March 13, with the wedding on March 15, and it was time to make a call. If you scroll up, you can see that removing the drape altogether was not an option - or at least not a quick one. The lace covering where it attaches to the waistband is heavily beaded, and removing all of that would mean hours of work. That out, I had to come up with another option. It was late, I was behind schedule, and I wanted to fix things. Solution? Shears. I decided to turn the drape into a sash. I grabbed my shears before I could change my mind and cut the chiffon on the bias, slightly longer in the front than the back. I then unpicked the appliques holding the center drape in place. I quickly rebeaded those appliques, and then stepped back to see what I had done. Not bad. Raw edges, but not bad. Okay, what to do with those raw edges? Since the dress was now heavily beaded and nearly done, it was not going back to the sewing machine. Also, I needed to have these two "sash ties" make sense with the rest of the dress. It was now 2:00am, so I went to bed for fear of making a(nother) rash decision. In the warm light of dawn, the day before the wedding, I decided what to do: turn that chiffon into a sash by applying a beaded fringe. This would weigh down the edges, bring some more color to the upper skirt, and let me use the really cool square beads I had given up on finding a use for. After all, I hate letting beads to unused. Here is what I found out next: making beaded fringe is fast, not too difficult, and really impressive! Just under two hours in, I had this result:
close up of fringe
the front beaded sash

the back beaded sash
Well, there you have it: finished dress! 


Monday, March 24, 2014

Edwardian Wedding Dress: so much lace

Thanks for reading along!
This is the point in the project where I diverged from a typical timeline to a long term project.  With a typical project, all that would be left to wrap up here would be to attach the bodice to the skirt, apply the closures, and stitch the facings in place. Instead, it was time to slow down progress and work on some fine details. This also meant it was time to drape my sewing area, since the dress would be on my mannequin for some time and I wanted to reduce its contact with dust and other bits on the floor. From here out, my mannequin was on floor cloth and draped in a king size sheet whenever I wasn't working on it.

Before I could begin plotting the bead design, I needed to place the lace appliques. I had an overall design in mind; the scalloped lace would go around the the neckline, along the skirt edge and train, then back up to the waist.  The scrolls would be placed out from the scalloped edge starting at the train and tapering up the skirt. The remaining appliques would fill in any gaps.

I like to work from the edges in, so my first step was to pin the scallops along the edges of the bodice and skirt. Once those were in place, I played with the other lace pieces until I got a design that I liked on the right side of the train then mimicked it on the left. This design went up the side of the skirt front and back as well, tapering out where the skirt overlaps at the skirt right.
skirt with edge in place ready to be stitched

edge lace on bodice and skirt,
with swirls accenting the waistline
train with lace appliques in place


I draped the main dress at this point and turned my attention to the underskirt. One of the things I loved about the inspiration gown was the tulle underskirt peeking out where the overskirt overlaps at the right side. To recreate that look, I purchased five yards of ivory tulle.  I cut the tulle in half and sewed it to the skirt lining in five layers starting twelve inches down from the waist.  To keep the line of the skirt, the tulle was sewn flat to the front of the lining and pleated to the back. I then sewed the peacock drop lace to the top layer of tulle in an asymmetrical line as on the original.
The lining back on the mannequin, I turned my focus to beading. That, of course, will be covered in my next post.

Saturday, March 22, 2014

Edwardian Wedding Dress: design to dress

In  my last post, I detailed my design process and my materials that I gathered to make my dress. As a quick recap, this dress is based on a court gown worn by Queen Maud of Norway in 1908/09 (sources vary) and I'll be making up the dress in a gold silk taffeta with silk chiffon and beaded lace accents.

With everything assembled, I prepped my studio setting my mannequin to my own measurements and packing away bits of previous projects. I'm all about efficiency, so I pulled out the era-specific patterns I own as a starting point rather than drafting the pattern from scratch. All gowns of this era have essentially the same foundation: a slightly high waisted bodice, straight or dolman sleeves, and a columnar skirt. The other design elements are draped over this foundation.

I pulled out the pattern that I have used most often, since I know it fits me best.  I did a quick re-measure of myself wearing the foundation garments I had selected to wear under the dress just to be certain there wasn't a major change in size and then cut out the dress lining.  This was made of a cotton voile, which is inexpensive enough that should I have to recut I wouldn't worry about the added expense.

One of the first changes I made to the base pattern was moving the opening.  The pattern I started with had a back button closure, which would drastically change the line of my design.  I moved that to a right side closure which would be essentially invisible on the finished dress. A few short tips here about moving a closure: do it first or there is no going back and remember to eliminate the seam allowance where the closure was and add it where it will be. In my case, I made the center back be a "place on fold" along what was formerly the back seam line and added a placket at the right side.  To avoid absentmindedly cutting on the existing lines, I traced the bodice pieces onto new paper and labeled them.
A whirl of green voile later, I had my bodice lining basted together and draped on my mannequin:
With the structural pieces done, it was time for the fun parts. I cut two pieces of tissue paper and draped them over the bodice lining to determine the shape I would need for the surplice front pieces. This allowed me to get a visual before cutting into my silk. It was also time to prep the lace for the sleeves and inserts. I had been given some pre-beaded lace at the end of last year, and wanted to use it for my dress. However, it was a bright white so I needed to stain it. This is not an inexpensive lace, so I stained only as much as I would need for my dress. I cut out two pieces large enough for the sleeves and bodice insert, then dyed them on the stove in a pot of very strong tea (15 tea bags in eight quarts of water):

lace soup
drying on the shower rod
I now had some lovely warm colored lace for my sleeves and inserts. Once the lace had dried, I cut out those three pieces and saved the scraps for extra beads and sequins.

The sleeve assembly is pretty basic: a french underarm seam and they are done. Of course, working with pre-beaded lace is a bit more complicated but I just removed all beads which were in the path of the seam and tied off the threads so that the rest of the beads remained in place. These were added to my bead containers for later use.

I laid the lace over the lining to see if the color worked. It was just a bit too green, so I tried it over the silk main fabric and that wasn't quite right other.  I quick visit to my silk bin netted a piece of silk organza in ivory which was perfect when laid over the silk.  It muted the gold of the silk without introducing another color, and gave the illusion of the lace being over skin only.  It also gave body to the lace which was very much needed.  To make the base for the insert, I cut a panel slightly wider than the lace out of voile and organza. I then laid the two pieces over each other, wrapping the organza around the voile on the sides to enclose the raw edges and top stitching in place. This finished panel was sewn to the bodice front lining, keeping the side lining free, and top stitching the long sides of the panel to the lining. The final step was to hand stitch the lace panel in place.
basting the organza and silk together

attaching the panel to the voile

lace panel pinned in place


That layer of the bodice complete, I cut out and assembled the silk skirt and over bodice. At this point, I was working with the bodice and skirt as two separate pieces for ease of work - being able to take the bodice off the mannequin was much easier without having to wrangle the whole dress.

I draped the silk for the bodice front, to play with where I would want to place the pleats.  These were meant to look like the dress had just been wrapped around and happened to drape perfectly.  In fact, these pleats were tacked in place to facings on both sides.

bodice draped over under bodice

with the lace edging pinned in place

skirt and bodice draped together


At this point, I tried on all of the dress pieces over my foundation garments to be certain everything fit. Satisfied all was good, it was time to start playing with trims. I basted a three inch bias strip of the cotton voile to all edges of the silk outer dress in order to support the lace edging, then stitched a bias facing of the silk which would enclose my hand stitching and give a crisp edge to the neckline and skirt hem.  That facing would remain free until all of the applique and bead work was complete.  I also placed the blue chiffon drape in preparation for placing the appliques on the train.
I'll pause here again. Next up: lace and more lace.

Thursday, March 20, 2014

Edwardian Wedding Dress: the design

I spend the majority of February making my wedding dress.  This was quite a departure for me, since I typically select projects that I can complete quickly. I'm a results oriented kind of gal, and like to see things come together in a few days.  A long term project for me will take a week from design to completion.

At first, my dress wasn't going to be a long term project. I have known for some time that when I got around to getting married, I would base my dress design on the fashions of the Edwardian era. I have always loved that era of fashion, specifically 1909. Yes, that is pretty specific, I know. I didn't mean to pick a single year, but I have just found that when I am leafing through books of old fashion plates or museum articles, every time I find a dress that jumps out to me, I check the date and there you have it. 1909.

Of course my first stop in my search for a dress design was the Kyoto Fashion book, along with my other fashion resource books. I have many dog eared pages in those books, including some that I mentally bookmarked as possible wedding dresses, but when I went back to them none of the photos were quite "it".

My next stop was a Google image search for "Edwardian Evening Gown". There, I found about a dozen gowns that I really liked one or more elements of. In reviewing my bookmarks, I found another common thread: Queen Maud of Norway.  I don't know how I had never heard of her before, but she rocked the fashion something fierce. Don't take my word for it, go to do a search now and see for yourself. She was amazing.

It was time to get a second set of eyes, so I went over my finalists with my daughter. There was one dress in particular that stood out to both of us - an ivory and black court dress:

Next, it was time to play a game of "what exactly do I love about this dress?" For me, it was the line of the skirt. I liked the heavy embroidery around the edges since it didn't detract from the smooth columnar line of the upper skirt. I also am a big sucker for asymmetrical design, which this dress definitely has.  The tulle under petticoat peeking out is a great contrast to the heavy satin of the dress.  I also liked the black tulle drape that seems to float down the dress from the waistband.

What did I not love about the dress? It's ivory/white. These are not my colors. It's embroidered. That is not my strength, nor would that fit in my timeline. Not. Gonna. Happen. Then, of course, there was the complete lack of photos of the front of that dress. I tried. They don't exist.

Given that I was never going to find a border print fabric which would work for this design and that the dress was a mystery from the side seams forward, I kept looking - but always came back to this one. Of course that means something, so I started brainstorming what to do about these two issues.

First, the front. That really isn't a huge deal. Incorporating a front design based on the back of a dress isn't difficult as long as you keep the design elements so that there isn't a clear jump in the design. Since the back of this dress showed a surplice style bodice, I just brought that to the front and made the bodice back smooth.  Then there was the issue of how to get that edging detail without going insane or purchasing an embroidery machine.  I had to walk away for a few days there in order to get perspective - then I thought of it. Lace. The flowers on the extant dress certainly do resemble appliqued lace, and that is not nearly as time consuming as embroidery would be.

My next stop was Etsy, to find rayon lace which I could get in a large batch and would emulate the swirls and scallops of the Art Nouveau era.  The more I searched, the more I kept really liking styles that reminded me of plumage - which then changed how I was picturing that train. It wasn't a train, it was a peacock's tail. Well, hello there, color idea. I started to get a clear idea in my brain of what the finished dress would look like-
A silk satin or taffeta in a gold/bronze with a hint of green. Antiqued lace appliques, heavily applied at the train and hem, then tapering up the dress.  Glass beads in shades of blue, green, and gold on the lace for a color accent.
Now that I had a good image in my brain, I set pencil to paper and sketched out my dress design:


As you can see, I made some pretty significant changes from the inspiration gown. The most significant of those changes was to make the bodice back relatively plain, another was to shorted the court train by about half.  I wanted the focus for the back of the dress to be the train, and I didn't want to trip so that had to be shortened to a manageable length.

I wanted to get my lace before the main fabric, since there is a much wider variety of fabric colors than lace colors. In searching for "peacock lace", I found a fantastic Etsy seller based out of Utah (amazing Cathy can be contacted here) that had several laces which would do perfectly for my dress.  I contacted her to confirm she could fulfill an order of the size I'd need, and she got right back to me to confirm.  We worked out the details, and I ordered these laces:
lace dyed
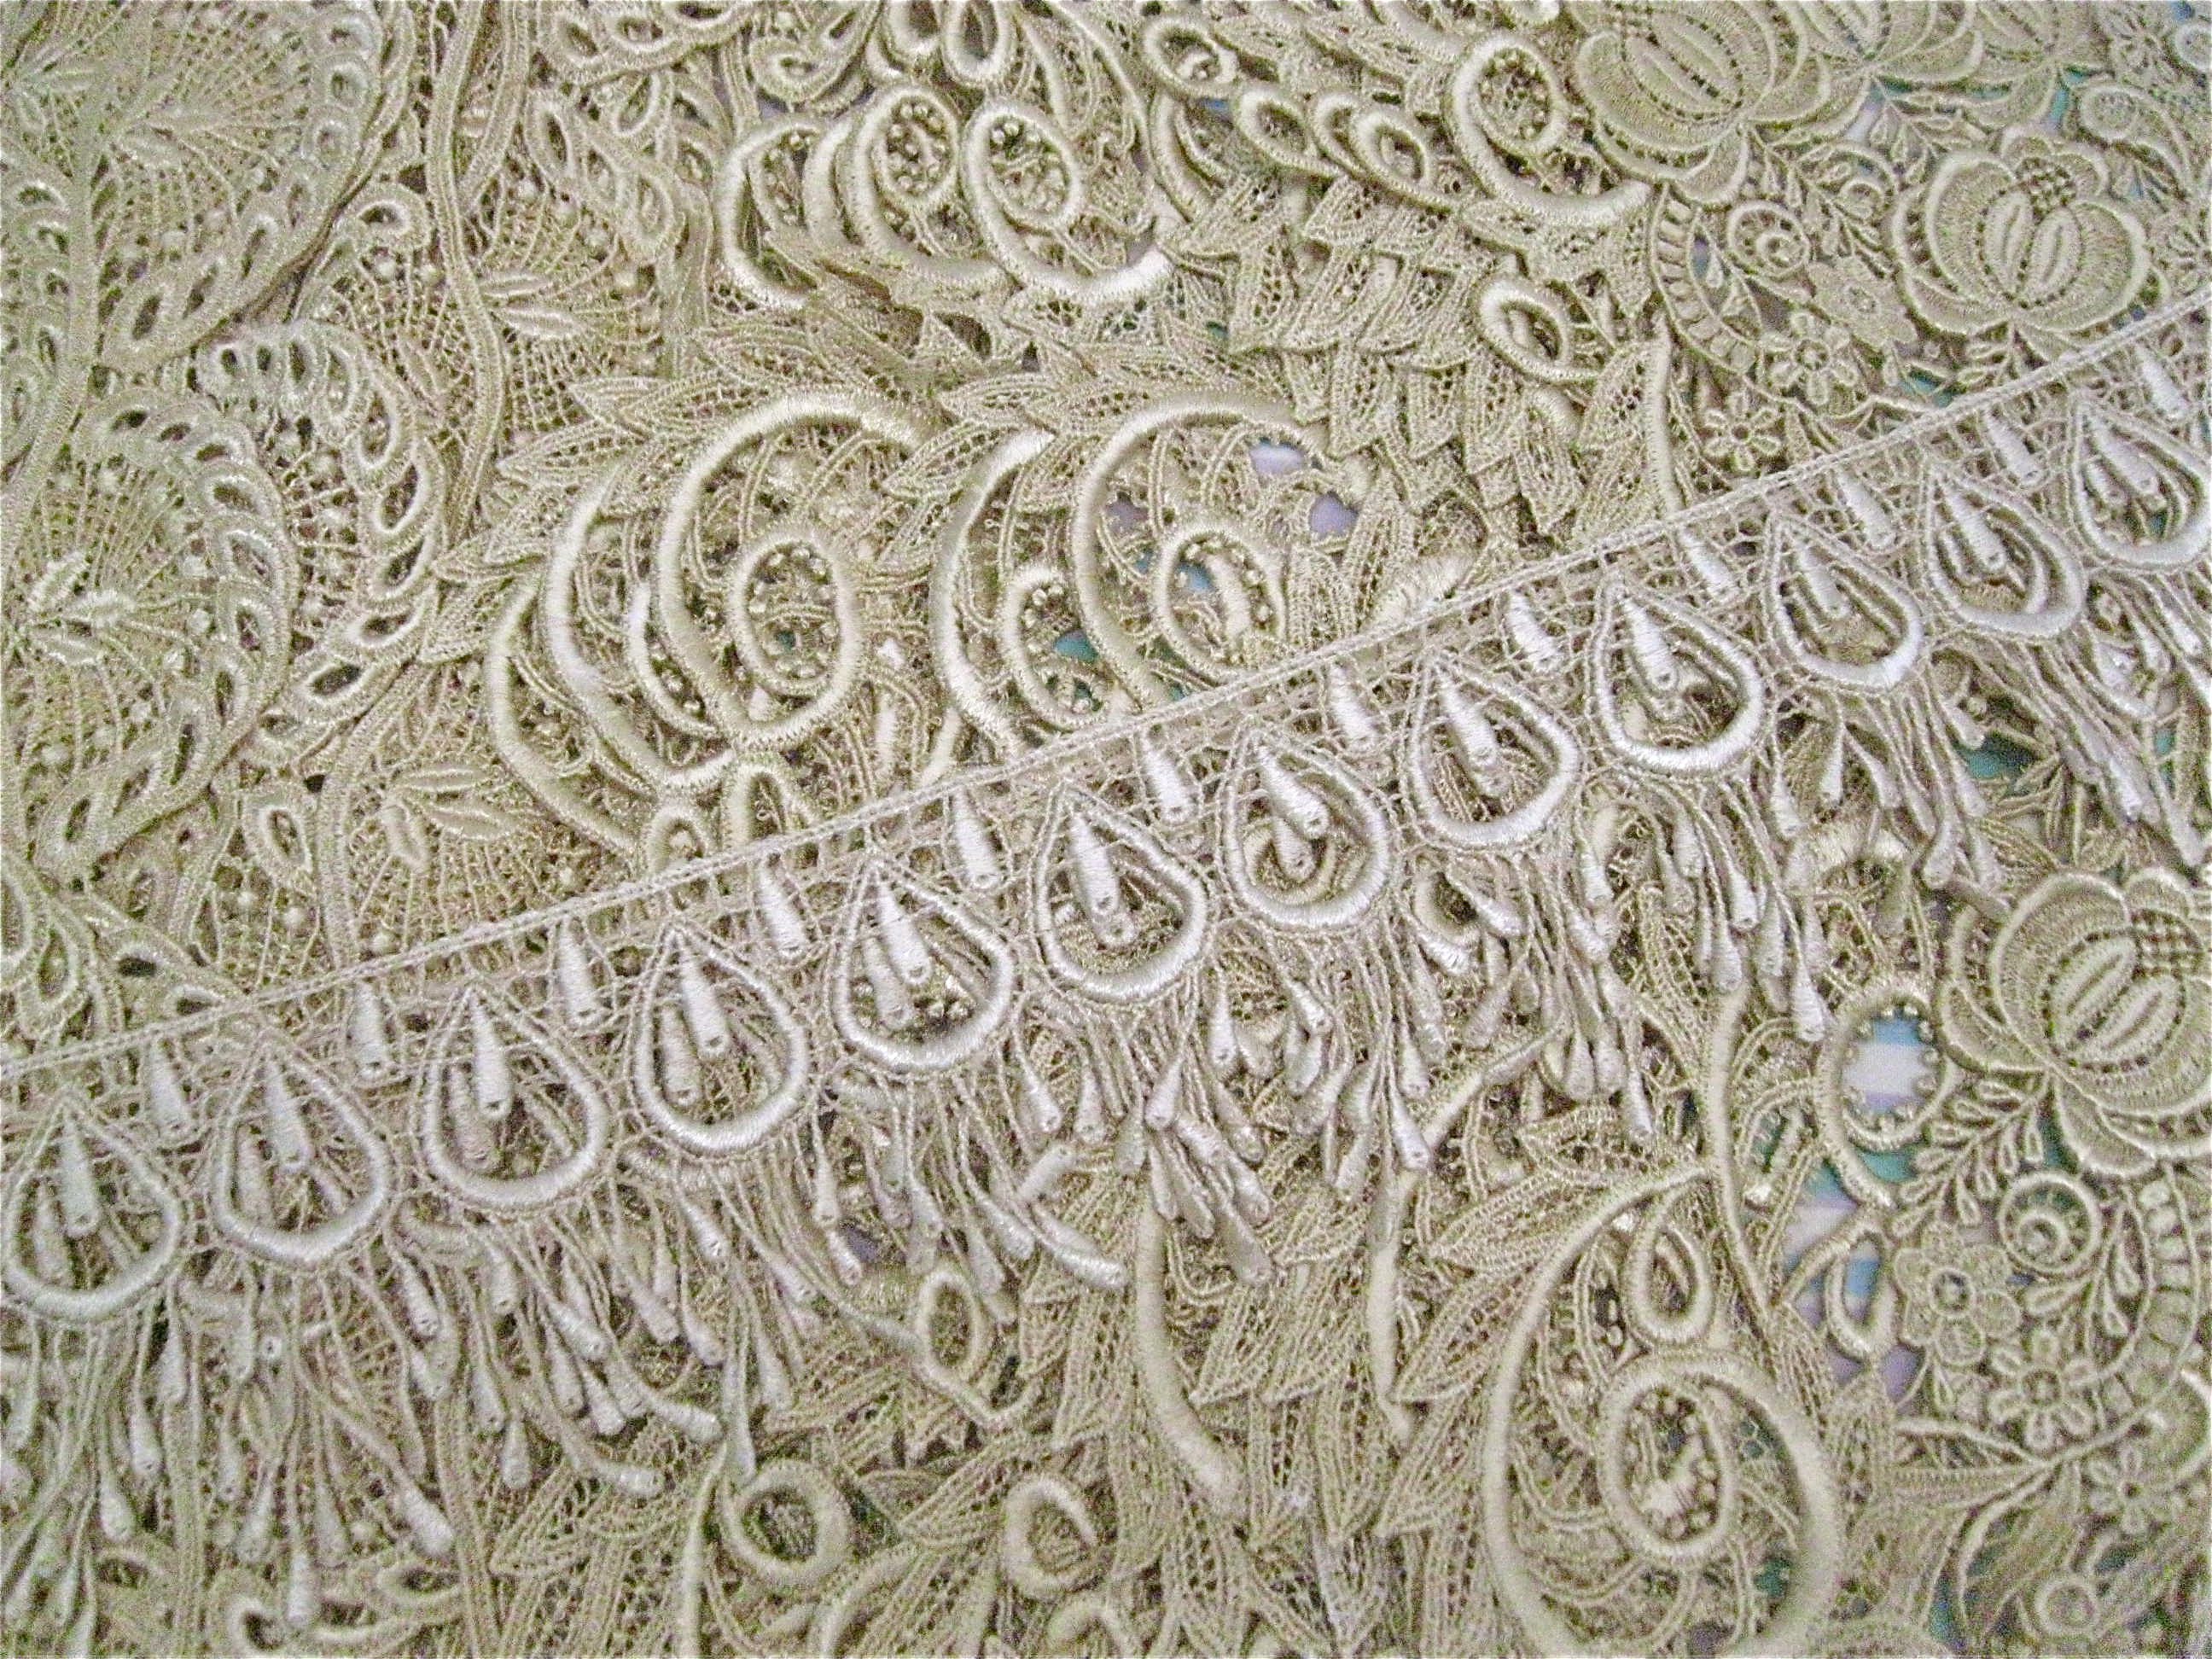
Amazing, right? That's ten yards of scalloped lace (top left corner), two yards of "peacock eye" lace (across the middle, twelve sets of "lace collars" that I call swirls/fronds/nautili (center-ish) and a few extra flourish bits thrown in for good measure.

Now that I had my lace, it was time for silk and bead shopping.  My silk I found at Mill End Fabrics, which is my go-to place for unique and high quality textiles. My beads I found at Shipwreck Beads , which is an amazing black hole of creative potential in Olympia, Washington. Yes, they have an Etsy shop and yes you should go there.

Design finished, all of the bits acquired, I was ready to get to cutting.  Here is my lovely shot of All My Wedding Dress Bits:


Next up: From Design to Dress. 

Edwardian Inspired Dinner Dress

I was recently married (watch for that entry soon!). My daughter was my bridesmaid, so we got to have the fun of designing a dress together. Since my dress was inspired by a 1908 design, my only direction to her was that her dress should be inspired by that era as well.
Our first step was to look over my fashion books so she could get an idea of what "the look" was for the first decade of the twentieth century. We then discussed what colors would be in my dress - gold, blue, and green - and what colors she feels look best on her. She then sketched up an initial design idea so that we could know what we were looking for when we went shopping.

The main design details she wanted to incorporate were the Asian-inspired wide sash and kimono sleeves. At first, she wanted her dress to be a deep blue with gold accents, but of course it all comes down to what fabric is available at the time.

We did our shopping at Mill End Fabrics, which is a fantastic local resource. It is an independently owned store - well, there are two - that stocks a great variety of quality fabrics. The one caveat to shopping there is that often there limited stock of any given fabric. This is because many of the fabrics are purchased in New York as factory (mill) end bolts, rather than being ordered from a supplier. This means shopping there is fun since you never know what you'll find, but it also means that you won't always find exactly what you're looking for since they don't have regular stock.

The first fabric to catch my daughter's eye was a forest green lace with antique gold stitching.  It is a gorgeous piece, and the scalloped edge is perfect for an Edwardian gown. This did change up the overall design of the dress, since she had wanted a solid color dress with a train which would not work with lace. A quick sketch later, we found coordinating fabrics: a matte satin to go under the lace, changeable taffeta for the sash, and a lush silk velvet as a contrast.

Here is my final design sketch:
Here are the fabrics we selected:
 The next step was to draft the pattern.  I based it on a Regency era pattern, since the lines for the two eras overlap and I already had a sloper in her size range.

Just to be certain that I had the sizing correct, I made up the lining in satin first as a muslin. This allowed me to make a few tweaks to the fit and yet be able to use the pieces on the finished dress.  Once I knew the fit was right, I got to get down to the fun of getting the bodice details sorted.

There are four layers to the bodice: the lining in satin which works as a base, the lace center front insert with satin underlay, the velvet at the side front and across the back, and the overlays that come down from the shoulders to the sash.

Since I already had the satin lining done, I used that as a guideline to cut the other pieces. The back was to be solid velvet, so I cut that and assembled it first. That set aside, I cut out the center inset pieces and side fronts. I used the satin underlay for the center front insert to face the front neck edge. This took care of the raw edges and provided a nice background for the lace insert which I centered and stitched by hand along the raw edges and neck edge.

In order to avoid puckering, and because silk velvet can be a bit touchy to work with, I decided to sew the side front pieces on by laying them flat on the lining and stitching them by hand. This allowed me to control the two fabrics so they didn't slip, and to avoid crushing the pile of the velvet with my machine presser foot. Honestly, some days it's just easier to sew velvet by hand and since this was such a small seam it wouldn't have made sense to set up my machine to sew it.

As this was going to be sewn flat, I ran a basting stitch 1/2 inch in from the raw edge and pressed the edge under along that line of stitching.  This allowed me to get a nice edge without slippage and also ease the curve of the edge.  I use this step any time I need to press under a rounded edge or the edge of any fabric that has a tendency to wiggle.


Here you can see the pressed under edge after it's been sewn down with hand stitches.  This does leave some of the satin facing visible, but that will be covered up later on.

Once the front was assembled, it was time to assemble the bodice. This was a bit tricky, since so many different things were happening at the sleeve. This meant more hand stitching, in order to be sure that each element went where it needed to go and that I didn't sacrifice control by using my machine, given the different fabric textures that were meeting up in several different ways.

Here are some action shots of that process:
hand stitching the velvet lower bodice to the armscye 
binding the overlay starting at the bodice back seam
joining three of the elements together
end result: no raw edges
The bodice completed, I attached the skirt and lining. We wanted to feature the scalloped lower edge, so I cut the skirt lining so it would stop at the highest point of the scallop so it would disappear. As was common for the era, I gathered the skirt in the back only.  This creates a nice columnar line in the front and moves the fullness to the back of the dress. I encased the raw edges of the skirt seam with the lower edge of the bodice lining, hand stitching it in place.

Now for my favorite part of the whole process: once a garment is all one piece, I get to drape it on a mannequin and get my first glance of it as it will look once finished.
A quick fitting later, I was ready for the home stretch - creating the sash. This would cover the final raw edges and bring the waistline down from the high Regency style to the natural waist.  I created the sash by cutting a piece of the satin lining in the width we wanted and to match my daughter's waist measurement. The taffeta was cut to be the one inch longer and three inches taller than the lining base. This gave room for me to wrap the taffeta around the raw edges of the lining at center back and to create the gathers of the design.

The lining was cut on grain to give shape, and the taffeta on the bias so I could manipulate it. I stitched rows of gathering stitches at the side seams then sewed the taffeta to the satin.  Once turned right side out, I drew the gathering stitches so that the overlay matched the lining and pinned the gathers in place. This naturally created gathers across the front and back of the sash.  I tacked the gathers in place along the side seams and in a zigzag pattern from side to side along the front.  Doing this keeps the gathers in place while allowing to to look like it is naturally gathered rather than anchored in place. 
sash lining and taffeta

gathers pinned in place to be tacked down
Now that the sash was complete, I pinned it to the bodice along the waist seam. This was also the point where I gathered the bottom edge of the shoulder overlays in order to give them some depth. I hand stitched the sash through all layers along the top and bottom edges.
overlay gathers pinned in place
sash in place ready to be stitched


The major construction complete, I finished the center back edges, applied a hook and eye closure, and hemmed the skirt lining.

my daughter wearing her dress at the wedding